I would definitely follow the recommendation at the end to use less cocoa. I used the recipe’s amount and found it too dense. I don’t have a stand mixer; hand mixer worked fine.

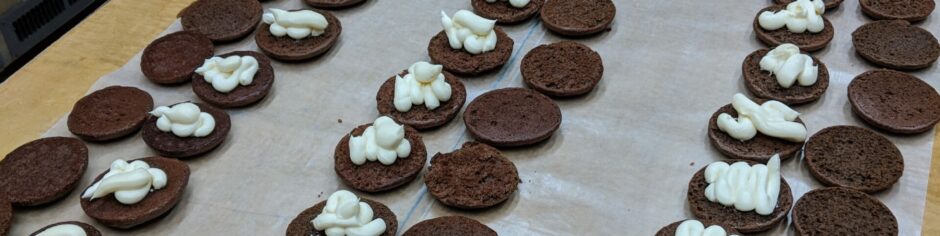
Red Velvet Whoopie
By Published: December 2, 2012
- Yield: About 48 cakes
I would definitely follow the recommendation at the end to use less cocoa. I used the recipe's amount and found it too dense. I …
Ingredients
- 2 1/2 cups all-purpose flour
- 1 cup cocoa powder, unsweetened
- 1 teaspoon baking powder
- 1/2 teaspoon baking soda
- 1/2 teaspoon salt
- 1/2 cup unsalted butter at room temp (1 stick)
- 1/2 cup vegetable shortening
- 1/2 cup brown sugar (packed)
- 1 cup sugar
- 2 large eggs
- 2 teaspoons vanilla
- 1/2 ounce red food coloring
- 1 cup buttermilk
Instructions
- Position a rack in the center of the oven and preheat the oven to 350 degrees. Line two baking sheets with parchment paper.
- Sift together the flour, cocoa powder, baking powder, baking soda, and salt onto a sheet of waxed paper.
- In the work bowl of a stand mixer fitted with the paddle attachment, beat together the butter, shortening, and both sugars on low speed until just combined. Increase the speed to medium and beat until fluffy and smooth, about 5 minutes. Add the eggs one at a time, beating well after each addition. Add the vanilla and red food coloring and beat just until blended.
- Add half of the flour mixture and half of the buttermilk to the batter and beat on low until just incorporated. Scrape down the sides of the bowl. Add the remaining flour mixture and 1/2 cup buttermilk and beat until completely combined.
- Using a spoon, drop about 1 tablespoon of batter onto one of the prepared baking sheets and repeat, spacing them at least 2 inches apart. Bake one sheet at a time for about 10 minutes each, or until the cakes spring back when pressed gently. Remove the baking sheet from the oven and let the cakes cool on the sheet for about 5 minutes before transferring them to a rack to cool completely.
- Note: Sarah likes a lot of cocoa in her red velvet cake, so much so that her end product often looks more Black Velvet than Red Velvet. You can adjust the cocoa in this recipe, using as little as 1/4 cup, if you like less cocoa flavor and want a more intensely red whoopie pie.
WordPress Recipe Plugin by ReciPress
You must be logged in to post a comment.